


3D printed parts have an inherent limitation: FDM plastic does not offer strong and durable threads. Screwing a screw directly into a printed hole works for a few operations, then the thread tears. Threaded inserts solve this problem, creating a robust, reusable and professional brass fastening point inside the moulded part.
Why use threaded inserts
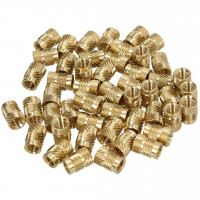
Threaded brass inserts offer decisive advantages over direct threading in plastic: vastly superior resistance to tearing, the ability to screw and unscrew hundreds of times without wear, more even load distribution in the moulded part, professional look and feel of the finished product, and compatibility with all standard metric fasteners.
Types of inserts
Heat set inserts
These are the most common type in 3D printing. They are installed by heating them with a soldering iron equipped with a special tip and pressing them into the prepared hole. The heat locally melts the surrounding plastic, which solidifies and engulfs the insert, creating a very strong mechanical bond. The outer knurl prevents rotation and removal. They work with PLA, PETG, ABS, ASA, Nylon and virtually all FDM materials.
Press-in inserts
They are cold-inserted by pressing them into the hole with a press or vise. They do not require heat, but offer a poorer seal than hot inserts. Useful for materials that do not tolerate localised heating well or for mass production where speed is a priority.
Expansion inserts
They have a geometry that expands when the screw is tightened, anchoring the insert in the plastic by mechanical interference. They do not require special tools but offer the lowest seal of the types.
Most common sizes for 3D printing
|
Threading |
Insert ext. diameter |
Recommended model bore |
Typical depth |
|
M2 |
3.2 mm |
3.0-3.1 mm |
3-4 mm |
|
M2,5 |
3.5 mm |
3.3-3.4 mm |
4-5 mm |
|
M3 |
4.0-4.6 mm |
3.8-4.4 mm |
4-6 mm |
|
M4 |
5.0-5.6 mm |
4.8-5.4 mm |
5-8 mm |
|
M5 |
6.0-6.4 mm |
5.8-6.2 mm |
6-10 mm |
Note: Exact measurements depend on the insert manufacturer. Always check the datasheet and test on a printed sample before production.
How to install hot-dip inserts: procedure step-by-step
The process is simple but requires attention. First, prepare the hole in the template CAD with the diameter recommended by the insert manufacturer. Mould the part with at least 3-4 perimeters around the hole to ensure solidity. Mount the appropriate tip on the soldering iron (conical tips of different diameters are available specifically for inserts). Set the soldering iron to approx. 200-220 °C for PLA and PETG, 250-270 °C for ABS and Nylon. Position the insert over the hole and press gently with the soldering iron. The insert will sink into the plastic in 3-5 seconds. Stop when the top of the insert is flush with the surface. Wait 30 seconds before screwing anything in: the plastic must solidify completely.
Common mistakes to avoid
Hole too small: the insert excessively deforms the plastic and creates tension. Hole too large: the insert does not have enough material to anchor itself. Temperature too high: the plastic degrades and loses strength. Temperature too low: the insert does not penetrate evenly. Press too fast: the insert tilts and is not perpendicular to the surface. Not enough perimeter: the insert tears the wall during tightening.
Inserts and tools at DHM-online
At DHM-online you will find threaded brass inserts in sizes M2 to M8, both individually and in assorted kits. Also available: soldering irons with interchangeable tips specifically for inserts, metric screws in all sizes, and the necessary tools for professional assembly.
Browse the Screws and Hardware section to find everything you need.


